Today's post is a bit of a DIY WIP. I had hoped to finish off a small project tonight, but after getting my flu shot, my body heavily disagreed with me. I'm a bit too drowsy and achey to push through the whole evening, unfortunately. But, the show has to go in in at least some small degree, so I thought I'd share what portion of it I have done.
WIP is a bit of a fitting status, given what it's for. Wish I could say more, but you'll have to wait until next month for the full details. Let's just say, someone else has a bit of a WIP in project going on in her life at the moment.
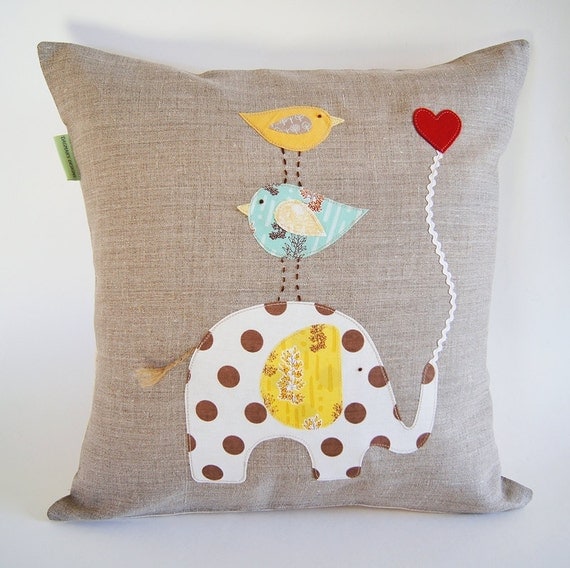
If it wasn't apparent in previous posts, I like to creep on people's Pinterest boards when I'm not doing anything else useful. While browsing one board, I came across two really cute, if similar images
| Image courtesy of Sarah Ward at Plum Pudding Illustration |
 |
| Image via Dagmarsdesigns on Etsy |
Of course, me being tightwad, frugal me said, "Ding dangit - I could probably make something similar for less than $43!"
So, I tried. Or, am trying.
I had some leftover fabric from my hippie dress that I made earlier this month. I wanted to make a fairly sizable pillow, so I cut as large a piece I could from the remainder.
For the various little elements, I bought some fabric squares and dug around my place a bit for more leftovers from previous projects
To make a pillow with appliqués, you have to attach those to the outside first before making the actual pillow, so I began work on the design. Based on the two pictures, I had a pretty good idea of what I wanted to do, and it involved a little cheating. To make it a little easy on myself, I blew up the image of the elephant to create a template
Cut it out, flipped it around, and traced out the shape
For those wondering why I flipped it around - I wanted to minimize the amount of marker that was visible on the front side, so I figured the side with the traced lines would the the "wrong" side. However, this became a moot point because I am an idiot and used a Sharpie.
It didn't help that I decided to use Fray Check on the outline to keep the shape from holding once I cut it
And proceeded to repeat this process on all the individual elements. Pro-tip - if you ever want to do something like this, while Fray Check is a semi-acceptable alternative to hemming or serging, use a waxy pencil and nothing oil or water-based to trace your shapes. Sharpie bleeds likes a mofo
While I let that dry, I made myself some din-dins
| Om nom nom, delicious turkey stuffed peppers |
Enough stuffing my face! Back to work!
Once everything was dry, I cut out the pieces and laid them out, trying to arrange them best as possible
Looks pretty good so far, I think! But now to figure out how to attach everything securely... @_@
(Probably) on Friday's episode of BEDIS: The story of how Victoria died in a freak hand-stitching accident.
Until the next.


No comments:
Post a Comment